Subversion (SVN for short) is a source code versioning system. TortoiseSVN is a GUI to access SVN. As the first step, download TortoiseSVN and install it on your machine. If you are using a 64-bit Windows, make sure you are download the 64-bit version of TortoiseSVN.
Each team has been assigned space on our SOC SVN server. For example, the following URL https://subversion.comp.nus.edu.sg/svn/cs3201/cs3201gX/trunk/ is for team X (Note: simply replace the "X" in the URL by your own team number, for example cs3201g2). This space, called a repository, is simply a central location where we keep shared files. However, this is different from standard file sharing because SVN also tracks changes made to file over time by different authors. You can browse the repository content by accessing the given URL through your web browser. Simply login with your SOC UNIX ID. For those accessing the repository from outside, please use SOC VPN (not NUS VPN).
The repository set up for you is created with the SVN-recommended directory structure, this includes three directories namely: 'trunk', 'branches' and 'tags'. 'trunk' directory is used as the location to store files corresponding to the main line of development. 'branch' directory is used to start a new branch of development, without affecting the main line of development. 'tags' directory is used to save special snapshots of your system (e.g., intermediate releases). Our course usually needs only the 'trunk' and 'tags' directories.
The repository given to each team is initially empty. Assign one team member to initialize it with the basic directory structure. Create a new solution, say CAP, used as the project name in this guide, from the VS.Net 2005. Add several projects to the new solution (corresponding to sub-parts of the CAP system, e.g., Query Evaluator, CKB, etc.). Organize your solution well, it is harder to modify this directory structure once uploaded to the SVN. Save the solution at the desired location (let's assume it is C:\CAP) . VS.Net 2005 will create the solution file and a list of folders corresponding to projects under C:\CAP. Let's call this directory the temporary project directory.
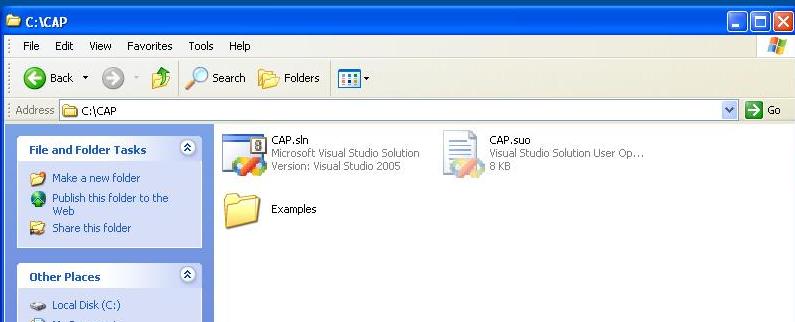
For illustration purpose, let's assume that at this step we have created a solution named CAP at C:/CAP with a project named Examples having one C# file named Form1.cs. Refer to the following snapshots of the directory structure.

Remove all unnecessary files to build CAP (temporary files, compiler-generated files, e.g. exe, obj, dll) from the project directory and its subdirectories. However, keep the solution (.sln) and project files (.csproj). Alternatively, you can set Tortoise SVN to ignore such files in the following manner: Right click an empty area of the desktop, choose TortoiseSVN > settings. Enter the string "*.exe *.dll *.user" (without double quotes) into the global ignore pattern box.
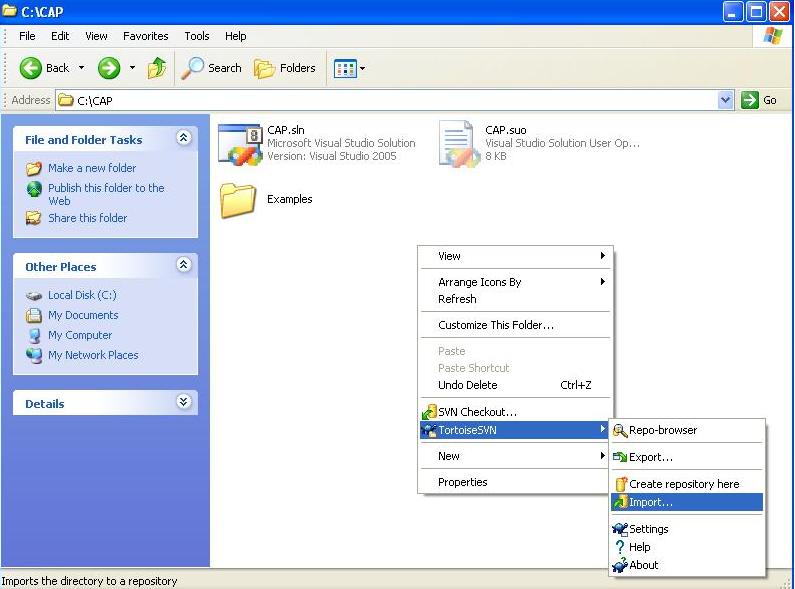
Let's now import to the repository (save the directory structure to the repository). Start the file explorer, go to the project directory (C:/CAP) right click and choose `TortoiseSVN>Import' as shown below.

The following dialog box will appear:

Type in the URL of the repository. Again, simply replace the "group0" in the above URL by your own group number. Remember that 'trunk' directory store files corresponding to the main development line. Great ! you have initiated the directory structure in your SVN project account.
Delete the content of C:/CAP to prepare for the next step. (yes delete it :-))

Put in the detail of your SVN repository URL (as mentioned in Step 1) and click OK.
'C:\CAP' will be initialized as your working copy. The SVN client will manage or 'remember' the link between files in the working copy and files stored in the repository. You will see the files and directories corresponding to the SPA solution your team member has initialized in Step 1. You will find that all the contents are the same as the original except for the inclusion of a SVN subdirectory (a hidden folder with suffix ".svn")in each directory. Congrats ! You have just retrieved your first working copy.
Note: 'import' command invoked in step 1 doesn't create a working copy, only a 'checkout' will create a working copy.
Assume the content of the file, Play.cs is as follows.
1 using System;
2 namespace Examples
3 {
4 public class Play
5 {
6 }
7 }

To check what changes has been made, right click Form1.cs and choose 'Diff'. The following dialog box will appear.

It highlights the modification that has been made to the original Form1.cs
file.

Add comment to the message box to indicate the changes that have been made (For example, "Addition to constructor body of Play class" in the above dialog box). The comment will be very useful in the future for change-tracking purpose. During the lifespan of the project, there will be multiple changes done by different developers at different time. Browsing the log messages will be useful to get an overview of what have changed.
Click OK.
To view a log of changes that have been made, right click, choose 'TortoiseSVN>Show Log'. The following dialog box will appear. It shows a history of changes that have been made to the repository.

Every commit will advance the 'Revision' number by 1. The 'Action' column in the log denotes the action that has been taken. The 'Author' column in the log denotes who had made the change (who to blame :-)). The 'Date' and 'Message' columns provide information on when changes were made and what was the nature of the changes.
To update your working copy with the latest version in the repository, right click and choose 'TortoiseSVN>SVN Update'.
Sometimes, you may discover that you need to revert back to an earlier version. Here's the way to do it. Right click, choose 'TortoiseSVN> Update to Revision'. The following dialog box will appear.

Enter the revision number to revert to and click OK.
To remove a file/directory:
Tagging is simply taking snapshots of the repository. We take a
snapshot of the repository (i.e., create a tag) at important points of your
project such as at the end of an iteration. This is because each iteration will
signify a stable version. If things get too messy as you move to the next
iteration, you will be happy to know that you can fall back on the set of stable
code (from the last iteration) and start again.
To create a tag, select the folder in your working copy which you want to tag,
then select the command TortoiseSVN ->Branch/Tag...., and give the URL which
contains the new tag. For example, to create a tag called 'V1.1' you could give
the URL as '[SVN_repository_URL]/tags/V1.1'. It looks like you are
creating a copy of the source code and gave it a different name, but SVN
internally stores it in a more efficient manner.